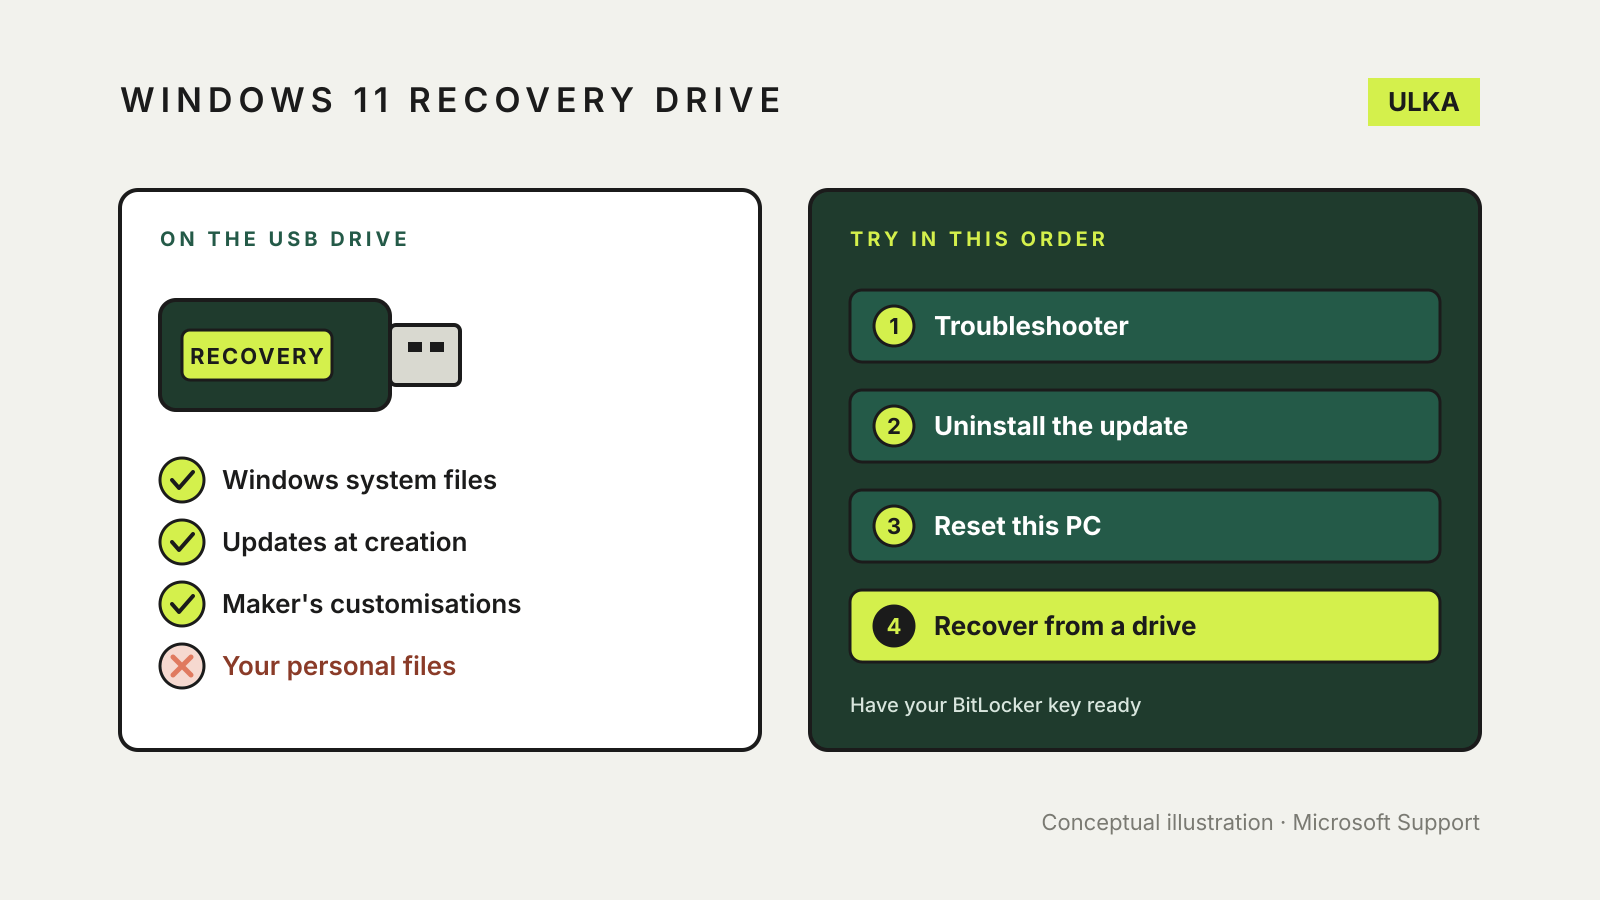
A Windows 11 recovery drive is a USB stick that can start your PC and reinstall Windows when it will no longer boot. To make one, search the Start menu for Recovery Drive (or run recoverydrive.exe), keep Back up system files to the recovery drive ticked, choose an empty USB drive and select Create. Everything already on that stick is erased, and the finished drive holds Windows system files, not your documents or photos.
This guide covers what goes on the drive, how to make it, how to use it when the PC is in trouble and what to do first, because a recovery drive is a last resort rather than a first fix. It follows Microsoft’s support pages, checked on 11 November 2026.
What a recovery drive contains
Microsoft describes the Recovery Drive tool as a way to back up the system files needed to restore a PC to its original state. The USB media includes:
- the built-in Windows files;
- any updates that were installed when you made the drive;
- customisations from the PC manufacturer.
It is meant for “bare metal” recovery on the PC it was made for, which means it can reinstall Windows even after the internal drive has been wiped or replaced.
What it does not contain is your personal files. Microsoft says to back those up separately with Windows Backup or File History. If you have not set that up yet, our guide to Windows File History and Time Machine walks through a local backup.
How to create a recovery drive
You need an empty USB drive. Microsoft warns that the process erases anything already stored on it, so do not reuse a stick with files you want to keep.
- Open the Start menu and search for Recovery Drive, then select it. You can also run
recoverydrive.exe. - Make sure Back up system files to the recovery drive is selected, then select Next.
- Plug in the USB drive, select it in the list and select Next.
- Select Create.
Microsoft notes that many files have to be copied, so this can take a while. Leave the PC plugged in and let it finish. When it is done, label the stick with the PC’s name and the date: the drive is made for that device, not for any Windows PC in the house.
Microsoft recommends making a new recovery drive once a year so it includes the latest Windows updates.
Before you reach for it: the gentler fixes
Reinstalling Windows from a recovery drive removes your personal files, apps and settings. Microsoft’s recovery options page puts it near the bottom of the list and suggests trying less disruptive fixes first.
| If the PC… | Try first | What is kept |
|---|---|---|
| Starts but misbehaves | A troubleshooter in Settings > System > Troubleshoot > Other troubleshooters | Everything |
| Started failing after an update | Uninstall the update | Files and apps |
| Starts but Windows is damaged | Reinstall Windows through Windows Update (Windows 11, version 22H2 or later) | Files, apps and settings |
| Needs a rollback | Point-in-time restore (Windows 11, version 24H2 or later) or System Restore | Depends on the option |
| Needs a fresh start | Reset this PC | Your choice: keep files or remove everything |
| Will not start at all | The same tools from the Windows Recovery Environment | As above |
Point-in-time restore keeps restore points for up to three days and rolls back files, apps and settings, according to Microsoft. System Restore rolls back only system files and settings.
If none of those work, or the PC cannot reach its own recovery tools, the recovery drive is the fallback you prepared earlier.
How to reinstall Windows from the recovery drive
- Back up any files you can still reach. Microsoft says this option removes personal files, apps and settings.
- Start the PC from the USB drive. The key or menu for booting from USB differs by manufacturer, so check the PC’s manual or support page.
- When the Windows Recovery Environment loads, select Recover from a drive.
- Choose Just remove my files or Fully clean the drive. The full clean takes longer and is the better choice if you are selling or giving the PC away; our guide to wiping a laptop before selling covers the rest of that checklist.
- Select Recover to start.
Three things that trip people up
BitLocker. Microsoft says that if BitLocker is on, you will need your BitLocker recovery key for most recovery options in the Windows Recovery Environment. Find and save it before anything goes wrong; here is where Windows stores it.
Secure Boot changes. Microsoft’s Recovery Drive page carries a note that recovery drives created and used on machines with the April 9, 2024 security update and its boot manager revocation policy applied may be affected, and points to its KB5025885 article. If your drive is older than the PC’s current security updates, make a fresh one.
Manufacturer images. For the best driver compatibility, Microsoft suggests checking your PC maker’s website for its own recovery media. Those images usually include hardware-specific drivers and factory apps that generic installation media may lack.
Recovery drive or Windows installation USB?
A recovery drive is made from your own PC and carries its manufacturer’s customisations. Windows installation media is a generic copy of Windows that you download on any working computer. Microsoft lists installation media as the route when nothing else works or when you suspect malware, and notes it removes everything in a clean installation. If you never made a recovery drive, that is the option still open to you.